Saturday, 20 June 2015

How to accept all Friend Requests at once on Facebook

Facebook as everybody know the largest social networking website. Everyone likes to be on Facebook and chat with friends, share photos, make friends, share stories and lot more. Most people using Facebook like to make lot of friends and some people may got hundreds or thousands of requests everyday. So it is very difficult for them to confirm these requests easily and if you have a slower connection then it is going to be very much frustrating task. But here on TechAntic we are always want to make your life easy with simple tricks that works.

pending facebook friend requests

Is this trick work ?

It will be work for most of the people and I have tried it personally and you don't have to misunderstand this trick is hacking or something. It is simple programming code which simplify your task.

How to Confirm or Accept Friend Request at once ?

*. First of all you need to log in to Facebook. Go to https://www.facebook.com/reqs.php

*. You will find out all the pending requests on this page if you have lot of friend requests then you have to click on Show more. Click on this until all the friend requests are visible.

*. Now right click anywhere on the page and click on Inspect Element and then click on the Console tab and paste following code as it is

javascript:for( i = 1;i<document.getElementsByName("actions[accept]").length;i++){document.getElementsByName("actions[accept]")[i].click();}void(0);

confirm facebook friend requests using inspect element

Note: If you're using Inspect Element in Firefox for the first time then it may possible that Firefox won't allow you to do that. If it happens then type enter on the Console panel and you are now allowed to paste.

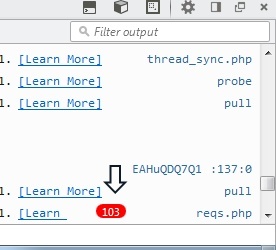
After all this process completed successfully you will see something like this as shown in the screenshot below. It means that your friend requests are started confirming automatically. Wait for sometime and all your pending requests will be accepted.

confirm accept friend request automatically

Hopefully this post helped you and you would enjoy using it. Keep in touch with us and don't forget to share the post.

Friday, 12 June 2015

how to enable Windows administrator account

Windows provide separate accounts for different users of the OS. There is one administrator user account who has all the privileges to access all the features of Windows but this default account provided during installation has limited access operations. Even though you have been using the account with administrative privileges, the tasks that have been performed may ask for a UAC confirmation. The elevated administrator account has been disabled in the windows 7,windows 8,windows 8.1 and windows vista.

Following are some simple methods to access administrator account of Windows:

*. If you are using Windows 7, 8 or 8.1 then you need to open command prompt (cmd) in administrator mode.

*. Then enter following commands on the command prompt
                                                 net user administrator /active:yes

After that,you would see a message that your command was successful. This will activate administrator account and you can access it after logging off the system.

administrator account activeted successfully

*. To disable the built in administrator account execute following commands on the command prompt
                                                   net user administrator /active:no

*. After this the administrator account will mo longer appear on the login screen.

This simple tutorial will definitely help you overcoming the problem of administrator privileges.

Friday, 5 June 2015

All about "Get Windows 10" app its problems and solutions

Everyone should aware of the Windows 10 upgrade which will be rolled out from 29 July 2015 throughout the world. It is a free upgrade for the users who own legal license to either Windows 7,8 or 8.1. Microsoft announced that all the upgrades to the present Windows users will be rolled out by a Get Windows 10 app which is similar to Windows upgrade assistant and you don't need to download is manually instead it will be automatically downloaded with the Windows updates.

get Windows 10 app reserve upgrade

How to install and use Windows 10 app?

*. As far as getting the Get Windows 10 app (GWA) you need to update your Windows with the optional update KB3035583.

get windows 10 app icon

*. With this update the app is automatically downloaded on your computer. This puts a small Windows logo near your system tray on task bar. You can click on that icon to check your system's compatibility for Windows 10 and after the launch of Windows 10 you can upgrade your Windows with Windows 10. You will need a good internet connectivity because it will approximately 3GB.

*. After this you will see a small Windows icon on your task bar near system tray. This can be used to start the app and you can check your system's compatibility with the app and also use it for later Windows upgrade when it will launch officially.

*. You can also reserve your Windows 10 upgrade for getting the notification when it is launched.

Problems and solutions for installing the Get Windows 10 app

*. If you don't see the icon of the app you need to check whether the update KB3035583 is downloaded and installed on your computer.

*. Check this from Windows update history. If you don't see the update you need to check for updates for the update to download and install.

*. Another way to check this update is from Command Prompt (cmd). Open cmd and type

                                        dism /online /get-packages | findstr 3035583

You will see output like this:

                         Package Identity : 
                        Package_for_KB3035583~31bf3856ad364e35~amd64~~6.3.1.29

If you still not getting the App icon on the taskbar then follow the following steps

*. Open Notepad and copy and paste the following script

REG QUERY "HKLM\SOFTWARE\Microsoft\Windows NT\CurrentVersion\AppCompatFlags\UpgradeExperienceIndicators" /v UpgEx | findstr UpgEx
if "%errorlevel%" == "0" GOTO RunGWX
reg add "HKLM\SOFTWARE\Microsoft\Windows NT\CurrentVersion\AppCompatFlags\Appraiser" /v UtcOnetimeSend /t REG_DWORD /d 1 /f
schtasks /run /TN "\Microsoft\Windows\Application Experience\Microsoft Compatibility Appraiser"
:CompatCheckRunning
schtasks /query /TN "\Microsoft\Windows\Application Experience\Microsoft Compatibility Appraiser"
schtasks /query /TN "\Microsoft\Windows\Application Experience\Microsoft Compatibility Appraiser" | findstr Ready
if NOT "%errorlevel%" == "0" ping localhost >nul &goto :CompatCheckRunning
:RunGWX
schtasks /run /TN "\Microsoft\Windows\Setup\gwx\refreshgwxconfig" 


*. Save this script as ReserveWin10.cmd in any directory like C drive.

*. Run the saved file as administrator and wait for the operation to complete. It may take 10 to 15 minutes to complete so be patient.

I hope you enjoyed this article and also hopeful that you will sort out the issues with windows 10 app. If you have any queries you can comment it below.

Friday, 13 February 2015

How to use WhatsApp on your browser

WhatsApp the worlds most popular messaging app is now available to you straight from your pc browser. Yes it's true you can now use your favowrite messaging platform on the web using your browser. This is an official WhatsApp's service for its users. The service is only available for Chrome browser and WhatsApp promises to deliver it on other browsers soon.

All the Android, Windows phone, Nokia and Blackberry users can get the benefit of this service. iOS devices are not yet supported due to Apple's platform limitations. To enjoy this service you need to have latest version of WhatsApp running on your phone and a Google Chrome browser on your pc.

How to use WhatsApp web on your browser

So let's begin and see how you can use WhatsApp on your web browser.

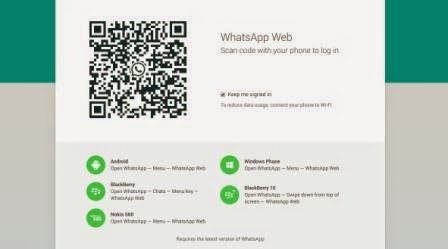
*. Open your Chrome browser and head over to the following url https://web.whatsapp.com and you will see something like in the screenshot below.

use whatsapp on your browser


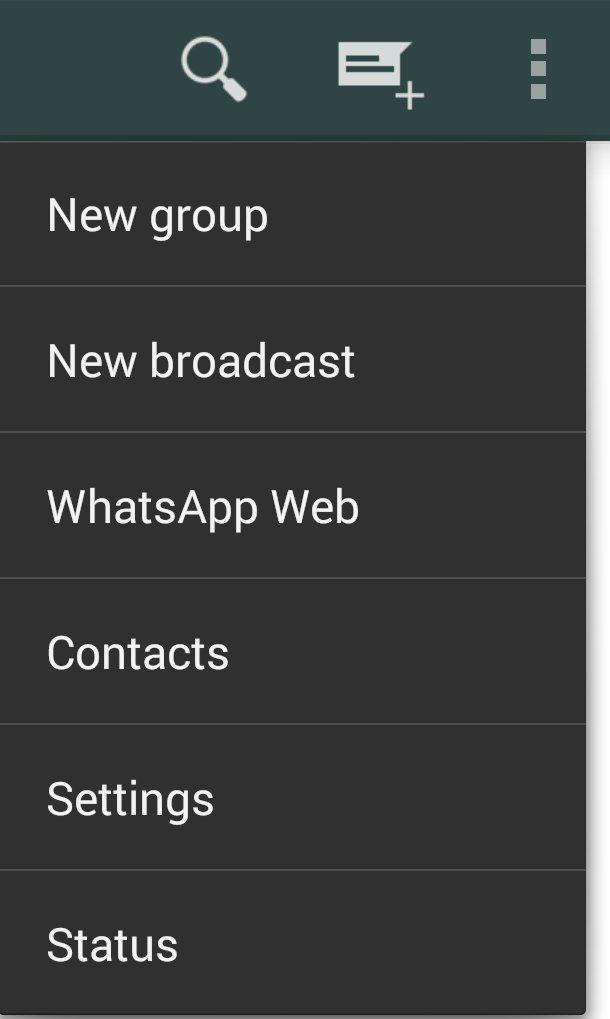
*. You can see a QR code on your browser. You don't need a QR reader you just need a phone on which you installed WhatsApp. So open your WhatsApp on your phone and tap on more options (which you can get from the three dots from the top right corner) and choose WhatsApp web.

whatsapp web option


*. A QR reader will open on your phone. Now point your phone towards the QR code on your computer and it will automatically logged in after reading the QR code.

*. Once your phone and computer are connected you are able to manage your logged in computers f1rom your phone via the Options  on the web menu of WhatsApp. From here you can log out from all computers or you can use the options menu in WhatsApp on the web to log out from the PC you're currently using.

*. WhatsApp will by default keep you logged in, but having logged out you'll need to go through the QR code process again the next time you want to log into WhatsApp on that machine.

Easier isn't it...! Enjoy WhatsApp on the web on your computer and start conversation in a new way from your browser.

Popular Posts